
User Manual
Understand ScreenCamera.Net Fundamentals
ScreenCamera.Net is based on a layer architecture.
Each layer corresponds to a file of extension FXS, file format proprietary of PCWinSoft, developer of ScreenCamera.Net.
FXS files are drawn layer-by-layer onto the ScreenCamera.Net video camera output.
ScreenCamera.Net video camera output can be opened for use by all programs and websites that support video webcams.
FXS files can be created and edited. Elements supported in FXS files are:
- System display monitors
- System installed video capture devices ( USB/FireWire )
- Images ( BMP, JPG, GIF )
- Polygons ( Rectangles, Triangles, and Ellipses )
- Texts
- Date-time stamps
- Groups formed by any combination of the above
FXS files can be grouped into lists. Lists of FXS receive the extension FXL: A FXL file is a list of FXS files.
ScreenCamera.Net 4 Sub-systems
ScreenCamera.Net is divided into 4 sub-systems: Draw, Image and Video Capture, Usability and Configuration:
1 - Draw system
2 - Image and Video Capture System
3 - Usability System
4 - Configuration System
1 - Draw System
1-5 - FXS file
1-4 - FXL file
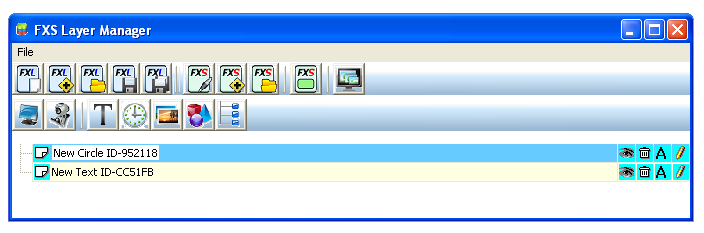
1-1 - Layer Manager
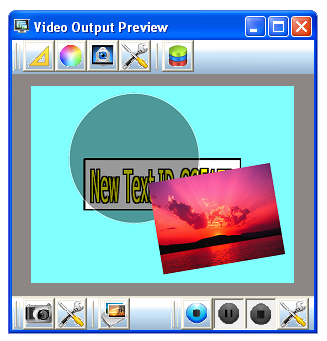
1-2 - Video Output Preview
1-3 - Editor of FXS files
1-5 - FXS file ( Explained )
FXS files are a file format proprietary of PCWinSoft, developer
of ScreenCamera.Net.
FXS files can only be created and edited using the
1-3 - Editor of FXS files
.
FXS files support a range of different elements:
- System display monitors
- System installed video capture devices ( USB/FireWire: Webcams, DV Camcorders, ... )
- Images ( BMP, JPG, GIF )
- Polygons ( Rectangles, Triangles, and Ellipses )
- Texts
- Date-time stamps
- Groups of the above
FXS files can be grouped into lists and saved into files of type
1-4 - FXL file
.
Important note about FXS and FXL files on disk
1-4 - FXL file ( Explained )
FXL files are text files that hold list of FXS files.
FXL files are created and saved on the
6-1 - Toolbar FXL
.
Important note about FXS and FXL files on disk
1-1 - Draw - Layer Manager
6-1 - Toolbar FXL
6-2 - Toolbar FXS
6-3 - Toolbar Add FXS to video output as layer
7-23 - Button -> Show Video output Window
1-2 - Draw -> Video Output Preview
6-4 - Toolbar Video Output
6-5 - Toolbar Image Capture
6-6 - Toolbar Video Capture
1-3 - Draw -> Editor of FXS files
6-2 - Toolbar FXS
6-7 - Toolbar Editor
6-3 - Toolbar Add FXS to video output as layer
6-8 - Toolbar Editor Background ( Camera or Color )
7-22 - Button -> Show Layer Manager Window
7-23 - Button -> Show Video output Window
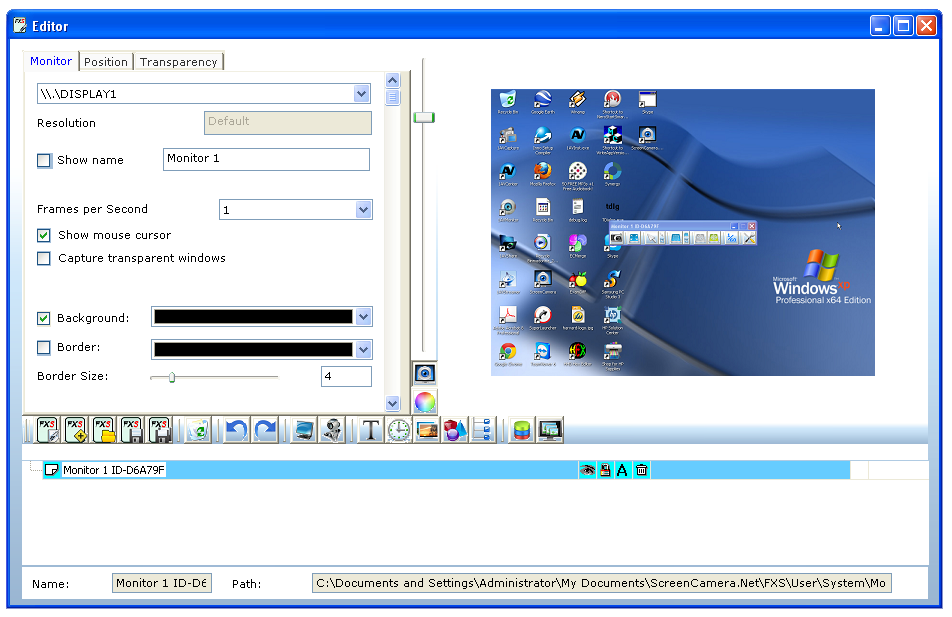
1-3-1 - Edit FXS of type Monitor/Display Device
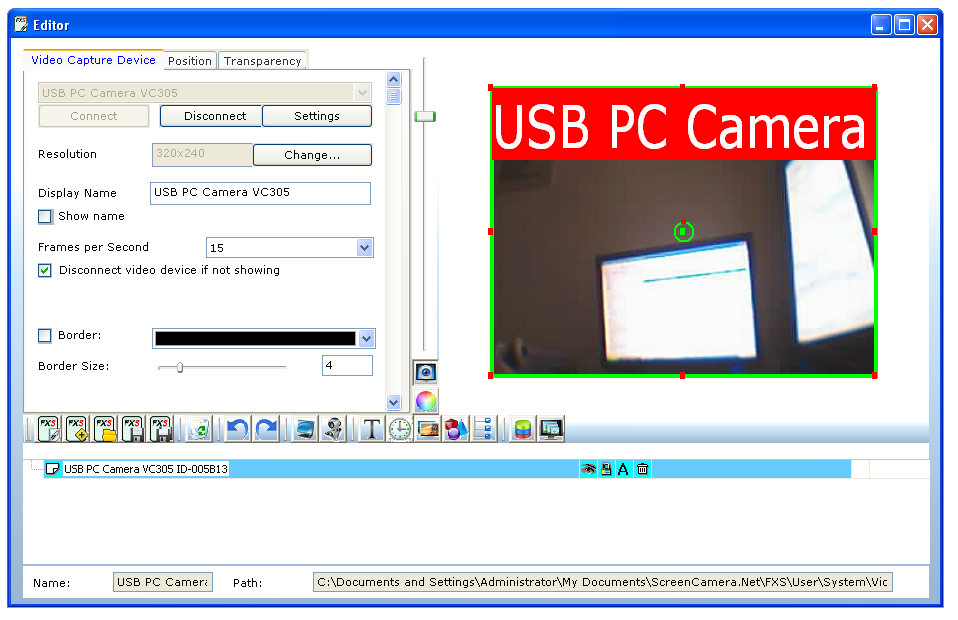
1-3-2 - Edit FXS of type Video Capture Device
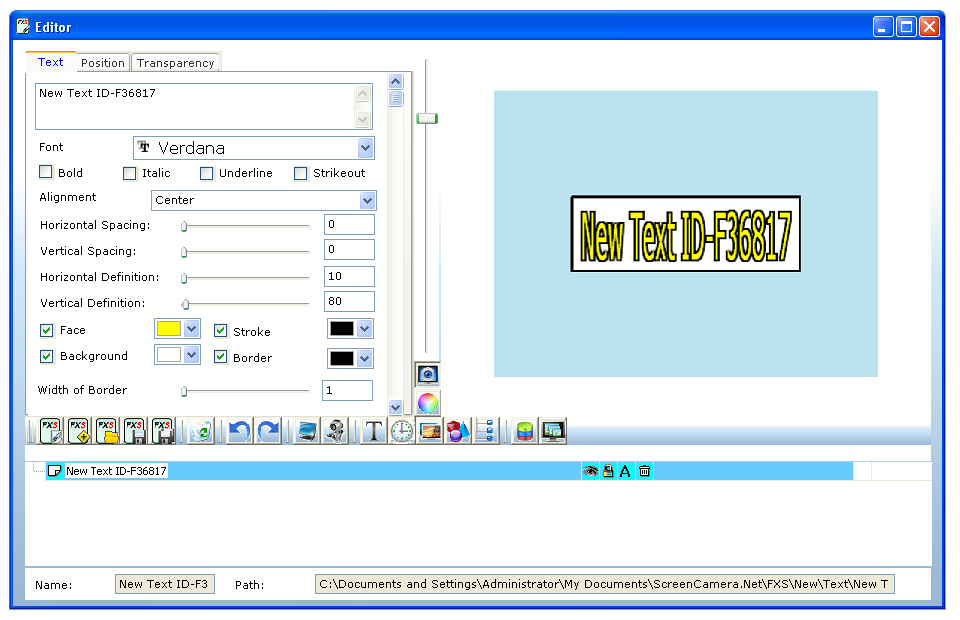
1-3-3 - Edit FXS of type Text
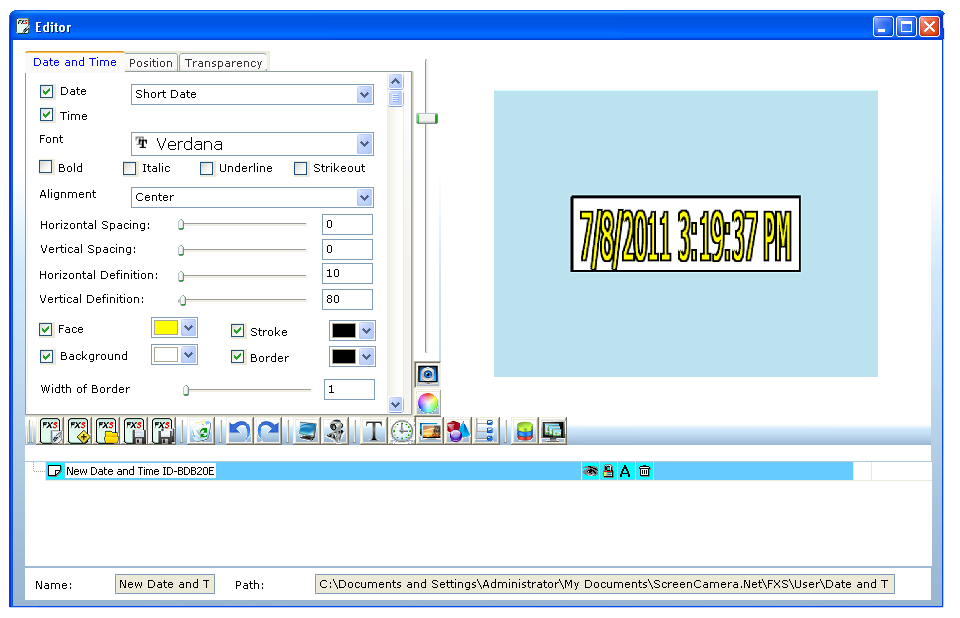
1-3-4 - Edit FXS of type Date & Time
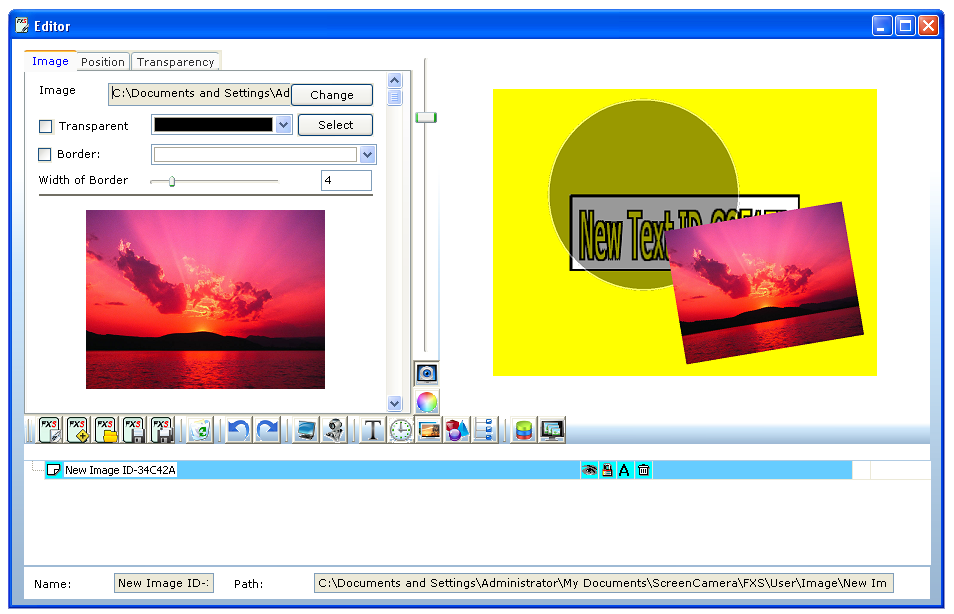
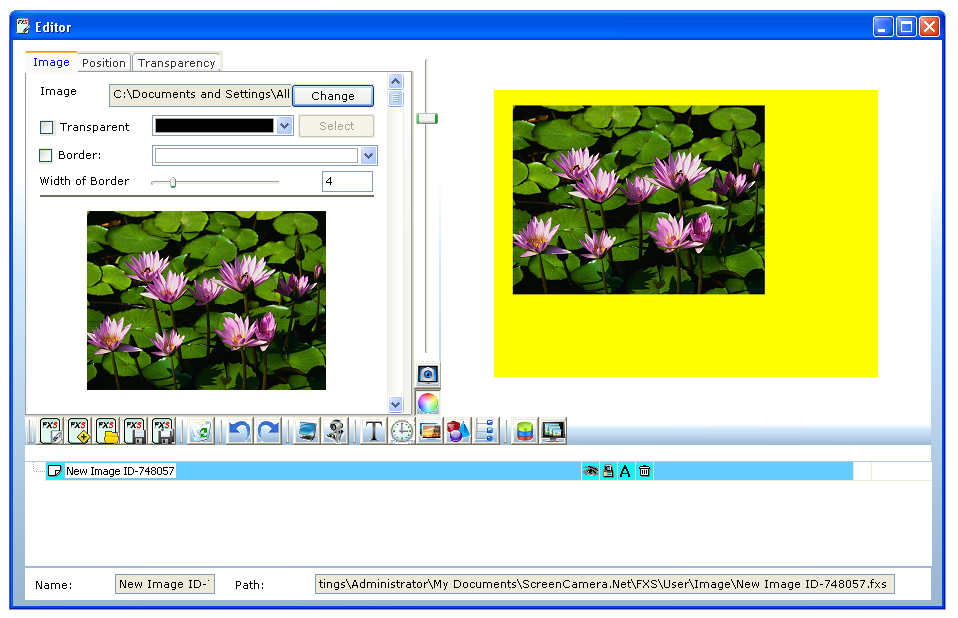
1-3-5 - Edit FXS of type Image
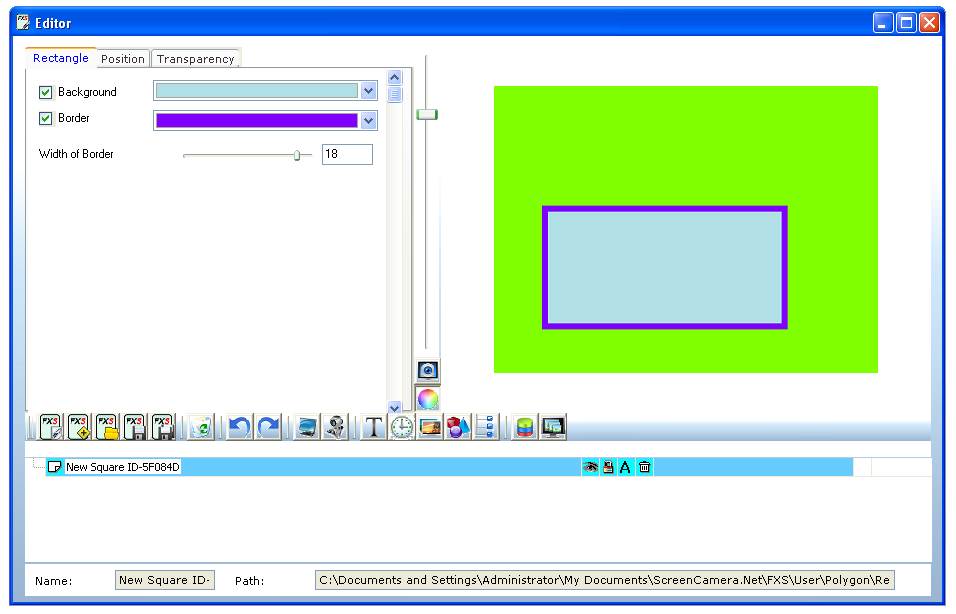
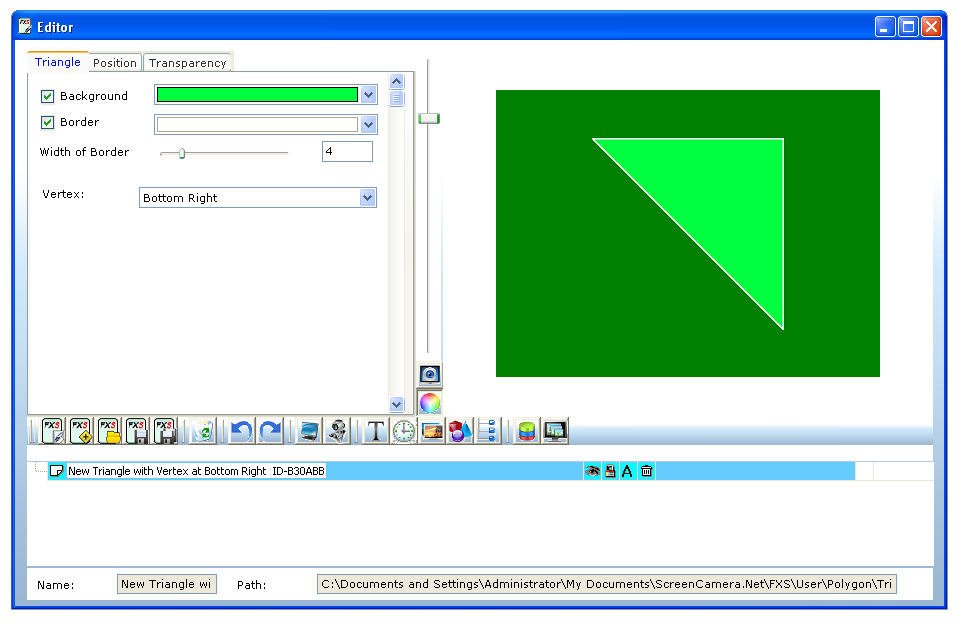
1-3-6 - Edit FXS of type Polygon
1-3-1 - Edit FXS of type Monitor/Display Device
1-3-2 - Edit FXS of type Video Capture Device
1-3-3 - Edit FXS of type Text
1-3-4 - Edit FXS of type Date & Time
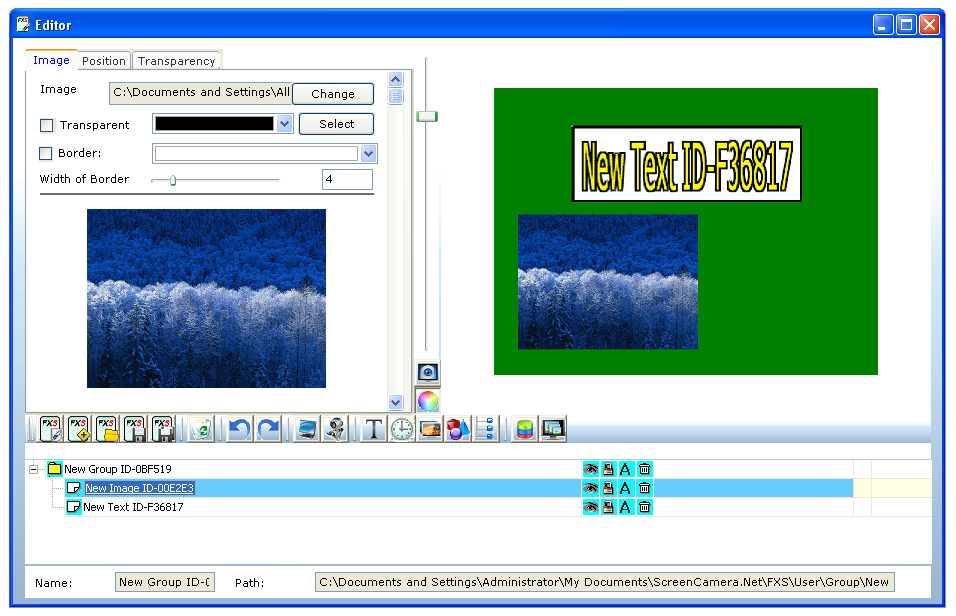
1-3-5 - Edit FXS of type Image
1-3-6-1 - Edit FXS of type Polygon -> Rectangle
1-3-6-2 - Edit FXS of type Polygon -> Ellipse

1-3-6-3 - Edit FXS of type Polygon -> Triangle
1-3-6-4 - Edit FXS of type Group
2 - Image and Video Capture System
1-2 - Video Output Preview<
/a>
2-2 - Image Browser
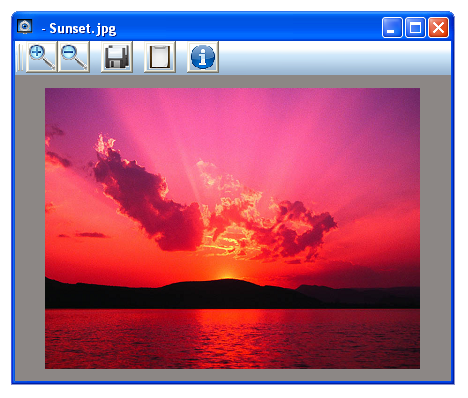
2-3 - Image Viewer
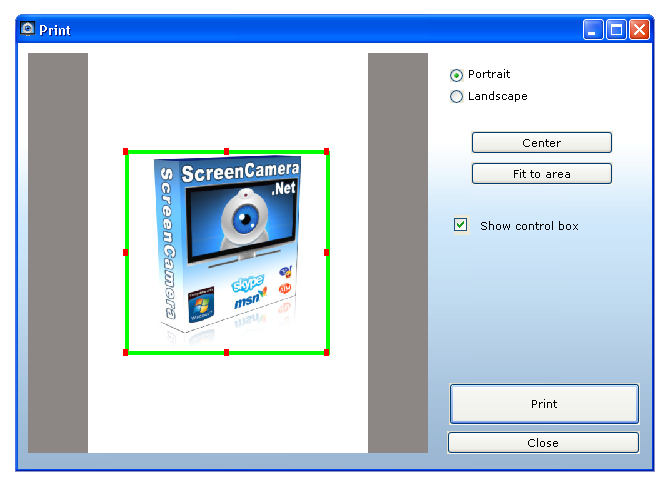
2-6 - Image Printer
2-4 - Video Browser
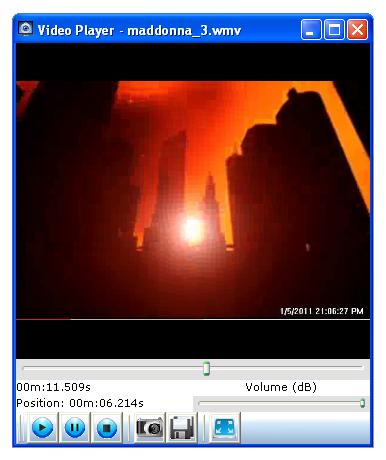
2-5 - Video Player
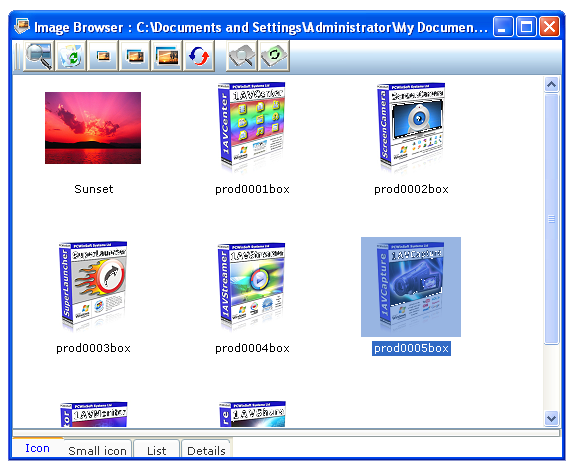
2-2 - Image Browser
6-9 - Toolbar Image Browser
2-3 - Image Viewer
6-10 - Toolbar Image Viewer
2-6 - Image Printer
6-10 - Toolbar Image Viewer
2-4 - Video Browser

6-11 - Toolbar Video browser
2-5 - Video Player
6-12 - Toolbar Video Player
3 - Usability System
3-1 - Program Menu
3-2 - Quick Access Panel
3-3 - Show/Hide Quick Buttons
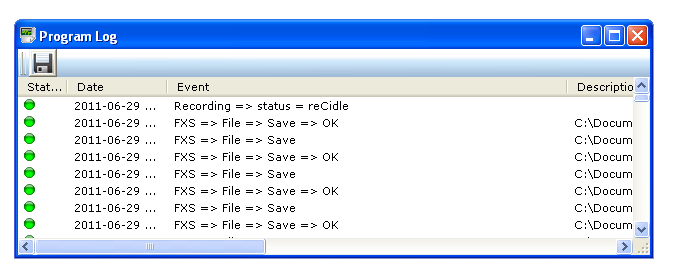
3-4 - Program Execution Log
6 - Toolbars
7 - Buttons
3-1 - Program Menu

3-2 - Quick Access Panel

6-3 - FXL file ( Explained )
6-4 - FXS file ( Explained )
6-1 - Toolbar FXL
6-2 - Toolbar FXS
6-3 - Toolbar Add FXS to vide output as layer
6-5 - Toolbar Image Capture
6-6 - Toolbar Video Capture
6-4 - Toolbar Video Output
6-13 - Toolbar Window
6-14 - Toolbar Help
3-3 - Show/Hide Quick Buttons

7-44 - Button -> Show/Hide Menu
7-45 - Button -> Show/Hide Quick Access Panel
3-4 - Log Window
7-43 - Button -> Save Log to disk
4 - Configuration System
4-1 - Settings for Video Output
4-2 - Settings for Image Capture
4-3 - Settings for Video Capture
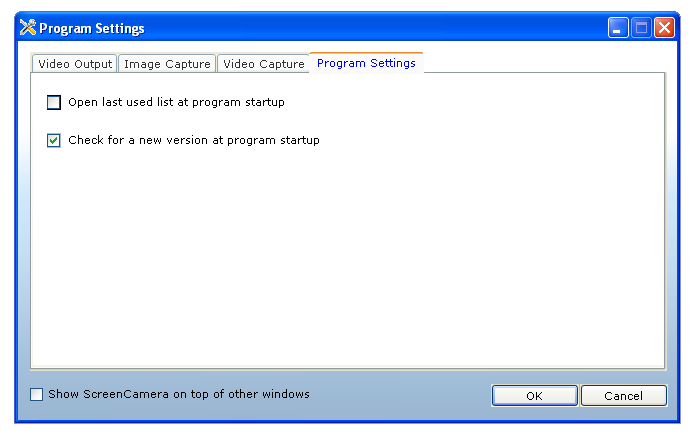
4-4 - Program Settings
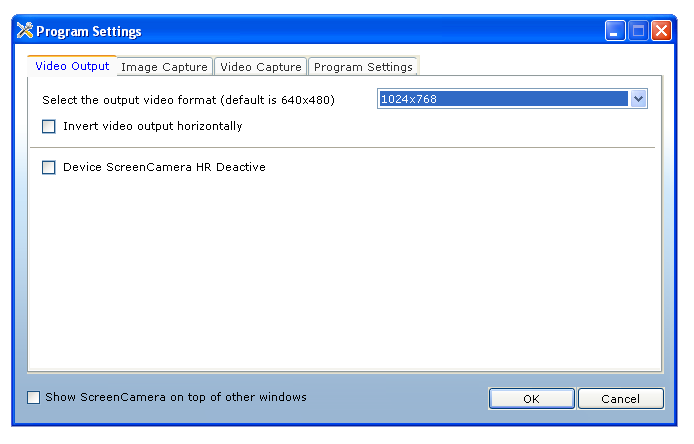
4-1 - Settings for Video Output
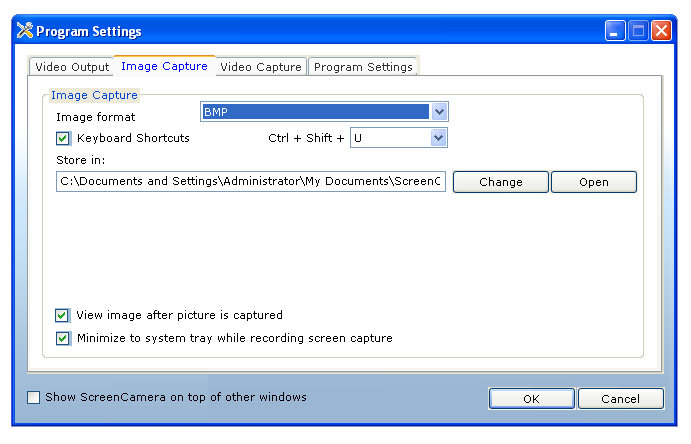
4-2 - Settings for Image Capture
7-58 - Button -> Change the location of the image folder
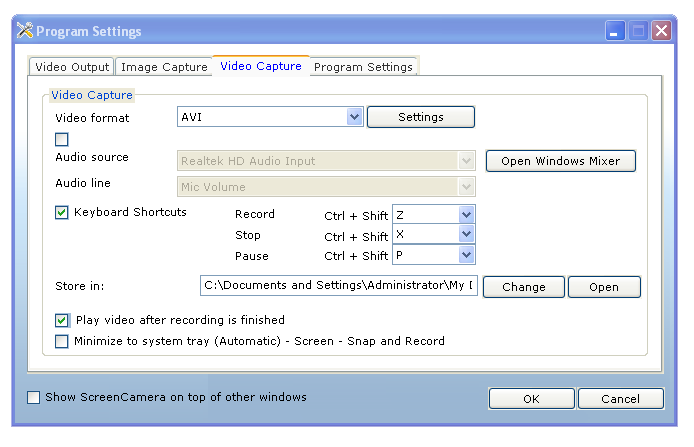
4-3 - Settings for Video Capture
7-58 - Button -> Change the location of the video folder
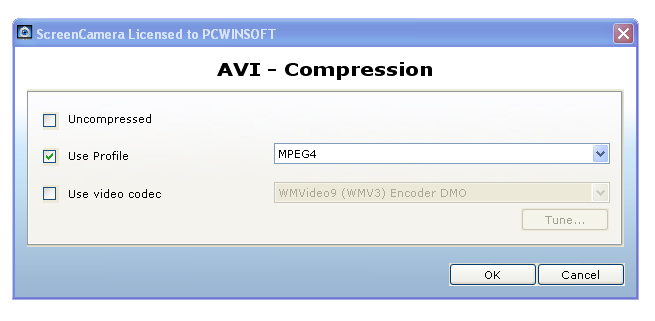
4-3-1 - Settings for AVI compression
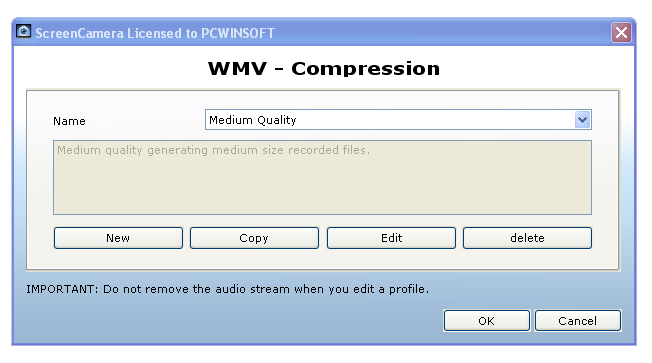
4-3-2 - Settings for WMV compression
4-3-1 - Video Capture -> AVI compression
4-3-2 - Video Capture -> WMV compression
4-4 - Program Settings
6 - Toolbars
6-3 - Toolbar Add FXS to video output as layer
6-4 - Toolbar Video Output
6-5 - Toolbar Image Capture
6-6 - Toolbar Video Capture
6-7 - Toolbar Editor
6-8 - Toolbar Editor Background ( Camera or Color )
6-9 - Toolbar Image Browser
6-10 - Toolbar Image Viewer
6-11 - Toolbar Video browser
6-12 - Toolbar Video Player
6-13 - Toolbar Window
6-14 - Toolbar Help
6-15 - Toolbar Log
6-16 - Monitor Capture Toolbar
6-1 - Toolbar FXL
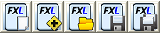
7-1 - Button -> New FXL file ( New list of FXS )
7-2 - Button -> Add FXL file from menu
7-3 - Button -> Open FXL file from disk
7-4 - Button -> Save FXL file
7-5 - Button -> Save FXL file As
6-2 - Toolbar FXS
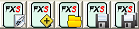
7-6 - Button -> New FXS file
7-7 - Button -> Add FXS file from menu
7-8 - Button -> Open FXS file from disk
7-9 - Button -> Save FXS file
7-10 - Button -> Save FXS file As
6-3 - Toolbar Add FXS to video output as layer

7-11 - Button -> Add FXS of family 'Monitor' to video output as layer
7-12 - Button -> Add FXS of family 'Video capture device' to video output as layer
7-13 - Button -> Add FXS of family 'Text' to video output as layer
7-14 - Button -> Add FXS of family 'Date and time' to video output as layer
7-15 - Button -> Add FXS of family 'Image' to video output as layer
7-16 - Button -> Add FXS of family 'Polygon' to video output as layer
7-17 - Button -> Add FXS of family 'Group' to video output as layer
6-4 - Toolbar Video Output

7-18 - Button -> Video Output Resolution
7-19 - Button -> Change color background of video output
7-20 - Button -> Activate and deactivate ScreenCamera.Net Camera Output
7-21 - Button -> Settings of Video Output
6-5 - Toolbar Image Capture

7-29 - Button -> Take Picture ( Capture image )
7-30 - Button -> Settings for Image Capture
7-25 - Button -> Show Image Browser Window
6-6 - Toolbar Video Capture

7-32 - Button -> Record ( Start recording )
7-33 - Button -> Pause
7-34 - Button -> Stop
7-35 - Button -> Settings of Video Capture
7-26 - Button -> Show Video Browser Window
6-13 - Toolbar Window

7-22 - Button -> Show Layer Manager Window
7-23 - Button -> Show Video output Window
7-24 - Button -> Show Editor of FXS files Window
7-25 - Button -> Show Image Browser Window
7-26 - Button -> Show Video Browser Window
7-27 - Button -> Show Program Settings Window
7-28 - Button -> Show log window
6-14 - Toolbar Help

7-38 - Button -> Product user manual
7-39 - Button -> Check for new version
7-40 - Button -> Visit Product Homepage
7-41 - Button -> Contact support
7-42 - Button -> About
7-28 - Button -> Show log window
6-7 - Toolbar Editor

7-46 - Button -> Editor -> Undo
7-47 - Button -> Editor -> Redo
7-48 - Button -> Editor -> Send FXS file to recycle bin
6-8 - Toolbar Editor Background ( Camera or Color )

7-49 - Button -> Editor -> Background = Color
7-50 - Button -> Editor -> Background = Camera contents
6-11 - Toolbar Video browser

7-51 - Button -> Play Video File
7-52 - Button -> Send video file to recycle bin
7-53 - Button -> Small thumbnails
7-54 - Button -> Medium thumbnails
7-55 - Button -> Big thumbnails
7-56 - Button -> Refresh files
7-57 - Button -> Open folder
7-58 - Button -> Change the location of the video folder
6-9 - Toolbar Image Browser

7-59 - Button -> View Image File
7-60 - Button -> Send image file to recycle bin
7-61 - Button -> Small thumbnails
7-62 - Button -> Medium thumbnails
7-63 - Button -> Big thumbnails
7-64 - Button -> Refresh files
7-60 - Button -> Open folder
7-58 - Button -> Change the location of the image folder
6-12 - Toolbar Video Player

7-67 - Button -> Play
7-68 - Button -> Pause
7-69 - Button -> Stop
7-70 - Button -> Take Picture ( Capture image )
7-71 - Button -> Save
7-72 - Button -> Full Screen
6-10 - Toolbar Image Viewer

7-74 - Button -> Zoom +
7-75 - Button -> Minus -
7-76 - Button -> Save
7-77 - Button -> Copy to Clipboard
7-78 - Button -> Information about image
6-15 - Toolbar Log

Button -> Save log file As
6-16 - Monitor Capture Toolbar
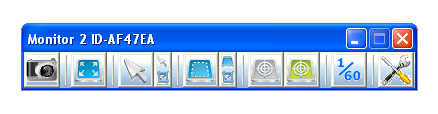
7-79 - Button -> Take picture from Monitor
7-80 - Button -> Capture full area of display device.
7-81 - Button -> Capture rectangle area around mouse cursor pointer.
7-82 - Button -> Change size of area to capture around mouse cursor pointer.
7-83 - Button -> Select region of the display device for capture.
7-84 - Button -> Change size of area to select display device region.
7-85 - Button -> Find Window.
7-86 - Button -> Find Window in Exclusive Mode.
7-87 - Button -> Change video capture frame-rate.
7-88 - Button -> Edit settings.
7 - Buttons
7-1 - Button -> New FXL file ( New list of FXS )
Button 'New FXL file' creates a new list removing any itens there are on the current
list.
This button is present on:
6-1 - Toolbar FXL
7-2 - Button -> Add FXL file from menu
Button 'Add FXL file from menu' shows a popup menu showing the FXL files present on
the ScreenCamera.Net local folder exactly like they are positioned
inside the folders.
Important note about FXS and FXL files on disk
This button is present on:
6-1 - Toolbar FXL
7-3 - Button -> Open FXL file from disk

Button 'Open FXL file from disk' presents a file selection dialog to select the FXL
file from the disk to open.
Important note about FXS and FXL files on disk
This button is present on:
6-1 - Toolbar FXL
7-4 - Button -> Save FXL file
Button 'Save FXL file to disk' saves the current list without asking for confirmation.
Important note about FXS and FXL files on disk
This button is present on:
6-1 - Toolbar FXL
7-5 - Button -> Save FXL file As
Button 'Save FXL file to disk As' presents a file selection dialog to select the FXL
file, and saves the current list to the file selected.
Important note about FXS and FXL files on disk
This button is present on:
6-1 - Toolbar FXL
7-6 - Button -> New FXS file

Button 'New FXS file' opens the Editor and asks the user which type of FXS file
is to be created.
Important note about FXS and FXL files on disk
This button is present on:
6-2 - Toolbar FXS
7-7 - Button -> Add FXS file from menu
Button 'Add FXS file from menu' shows a popup menu showing the FXS files present on
the ScreenCamera.Net local folder exactly like they are positioned
inside the folders.
Important note about FXS and FXL files on disk
This button is present on:
6-2 - Toolbar FXS
7-8 - Button -> Open FXS file from disk
Button 'Open FXS file from disk' presents a file selection dialog to select the FXS
file from the disk to open.
Important note about FXS and FXL files on disk
This button is present on:
6-2 - Toolbar FXS
7-9 - Button -> Save FXS file
Button 'Save FXS file to disk' saves the current FXS under edition.
Important note about FXS and FXL files on disk
This button is present on:
6-2 - Toolbar FXS
7-10 - Button -> Save FXS file to disk As
Button 'Save FXS file to disk As' presents a file selection dialog to select the FXS
file, and saves the currently edit FXS to the file selected.
Important note about FXS and FXL files on disk
This button is present on:
6-2 - Toolbar FXS
7-11 - Button -> Add FXS of family 'Monitor' to video output as layer
Button shows the menu of FXS files of type 'Monitor/Display Device'
for addition.
Important note about FXS and FXL files on disk
This button is present on:
6-3 - Toolbar Add FXS to video output as layer
7-12 - Button -> Add FXS of family 'Video capture device' to video output as layer

Button shows the menu of FXS files of type 'Video Capture Device'
for addition.
Important note about FXS and FXL files on disk
This button is present on:
6-3 - Toolbar Add FXS to video output as layer
7-13 - Button -> Add FXS of family 'Text' to video output as layer

Button shows the menu of FXS files of family 'Text'
for addition.
Important note about FXS and FXL files on disk
This button is present on:
6-3 - Toolbar Add FXS to video output as layer
7-14 - Button -> Add FXS of family 'Date and time' to video output as layer

Button shows the menu of FXS files of family 'Date and Time'
for addition.
Important note about FXS and FXL files on disk
This button is present on:
6-3 - Toolbar Add FXS to video output as layer
7-15 - Button -> Add FXS of family 'Image' to video output as layer

Button shows the menu of FXS files of family 'Image'
for addition.
Important note about FXS and FXL files on disk
This button is present on:
6-3 - Toolbar Add FXS to video output as layer
7-16 - Button -> Add FXS of family 'Polygon' to video output as layer
Button shows the menu of FXS files of family 'Polygon'
for addition.
Important note about FXS and FXL files on disk
This button is present on:
6-3 - Toolbar Add FXS to video output as layer
7-17 - Button -> Add FXS of family 'Group' to video output as layer

Button shows the menu of FXS files of family 'Group'
for addition.
Important note about FXS and FXL files on disk
This button is present on:
6-3 - Toolbar Add FXS to video output as layer
Important note about FXS and FXL files on disk:
Note 1: FXS and FXL files can only be saved and opened under the
ScreenCamera.Net folder on the local PC. The ScreenCamera.Net folder is
selected at installation by the user and set to 'My PC -> My Documents' folder by default.
Note 2: FXS and FXL files can be saved under sub-folders created by the user. Users
have freedom to create sub-folders under the FXS folder under ScreenCamera.Net
folder on the local PC.
7-18 - Button -> Video Output Resolution

Change ScreenCamera.Net video output resolution.
This button is present on:
6-4 - Toolbar Video Output
7-19 - Button -> Change color background of video output
Change the background color of the video output draw canvas.
This button is present on:
6-4 - Toolbar Video Output
7-20 - Button -> Activate and deactivate ScreenCamera.Net Camera Output

Activate/Deactivate 'ScreenCamera.Net Camera' video output.
This button is present on:
6-4 - Toolbar Video Output
7-21 - Button -> Settings of Video Output

Change the
Settings for Video Output.
This button is present on:
6-4 - Toolbar Video Output
7-22 - Button -> Show Layer Manager Window
Show Layer Manager window and bring it to user focus.
This button is present on:
6-13 - Toolbar Window
7-23 - Button -> Show Video output Window
Show Video Output Preview window and bring it to user focus.
This button is present on:
6-13 - Toolbar Window
7-24 - Button -> Show Editor of FXS files Window
Show Editor window and bring it to user focus.
This button is present on:
6-13 - Toolbar Window
7-25 - Button -> Show Image Browser Window
Show Image Browser window and bring it to user focus.
This button is present on:
6-13 - Toolbar Window
7-26 - Button -> Show Video Browser Window

Show Video Browser window and bring it to user focus.
This button is present on:
6-13 - Toolbar Window
7-27 - Button -> Show Program Settings Window

Show
Program Settings
window and bring it to user focus.
This button is present on:
6-13 - Toolbar Window
7-28 - Button -> Show log window

Show
Program Execution Log window
and bring it to user focus.
This button is present on:
6-13 - Toolbar Window
7-29 - Button -> Take Picture ( Capture image )

Capture the current image of the camera video output.
This button is present on:
6-5 - Toolbar Image Capture
7-30 - Button -> Settings for Image Capture

4-2 - Settings for Image Capture
This button is present on:
6-5 - Toolbar Image Capture
7-31 - Button -> Show image browser window
Show image browser window
This button is present on:
6-5 - Toolbar Image Capture
7-100 - Button -> Change the location of the image folder
The user can change the location folder of the folder to list 'Images'.
ScreenCamera.Net starts using its own folder, but the user has the ability to
change it.
This button is present on:
6-6 - Toolbar Image Capture
7-32 - Button -> Record ( Start recording )

Start to record the video output.
This button is present on:
6-6 - Toolbar Video Capture
7-33 - Button -> Pause

Pause the recording of the video output.
This button is present on:
6-6 - Toolbar Video Capture
7-34 - Button -> Stop

Stop recording the video output.
This button is present on:
6-6 - Toolbar Video Capture
7-35 - Button -> Settings of Video Capture

4-3 - Settings for Video Capture
This button is present on:
6-6 - Toolbar Video Capture
7-37 - Button -> Show video browser window
Show video browser window
This button is present on:
6-6 - Toolbar Video Capture
7-38 - Button -> Product user manual

Open ScreenCamera.Net User Manual.
This button is present on:
6-14 - Toolbar Help
7-39 - Button -> Check for new version

Check if there is a new version of ScreenCamera.Net.
This button is present on:
6-14 - Toolbar Help
7-40 - Button -> Visit Product Homepage

Visit product homepage on the Internet.
This button is present on:
6-14 - Toolbar Help
7-41 - Button -> Contact support

Submit a support ticket regarding sales, technical support, or accounting subjects.
This button is present on:
6-14 - Toolbar Help
7-42 - Button -> About

Information about the application.
This button is present on:
6-14 - Toolbar Help
7-43 - Button -> Save Log to disk
Save Program Execution Log to .TXT file.
This button is present on:
6-15 - Toolbar Log
7-44 - Button -> Show/Hide Menu

Show/hide the application Main Menu.
7-45 - Button -> Show/Hide Quick Access Panel

Show/hide the application Quick Access Panel.
7-46 - Button -> Editor -> Undo

Undo to last edition moment.
This button is present on:
6-7 - Toolbar Editor
7-47 - Button -> Editor -> Redo

Redo to next edition moment.
This button is present on:
6-7 - Toolbar Editor
7-48 - Button -> Editor -> Send FXS file to recycle bin

Remove the FXS file from the ScreenCamera.Net folder and send it to the system
Recycle Bin.
This button is present on:
6-7 - Toolbar Editor
7-49 - Button -> Editor -> Background = Color
Set the background canvas of the Editor to be a Color. A second click opens
the color picker to select and change the background color of the Editor canvas.
This button is present on:
6-8 - Toolbar Editor Background ( Camera or Color )
7-50 - Button -> Editor -> Background = Camera contents
Set the background canvas of the Editor to be the on-going output of the video camera.
This button is present on:
6-8 - Toolbar Editor Background ( Camera or Color )
7-51 - Button -> Play Video File

Play the selected video file.
This button is present on:
6-11 - Toolbar Video browser
7-52 - Button -> Send video file to recycle bin

Send the selected video file to the system recycle bin.
This button is present on:
6-11 - Toolbar Video browser
7-53 - Button -> Small thumbnails
Small thumbnails.
This button is present on:
6-11 - Toolbar Video browser
7-54 - Button -> Medium thumbnails
Medium thumbnails.
This button is present on:
6-11 - Toolbar Video browser
7-55 - Button -> Big thumbnails

Large thumbnails.
This button is present on:
6-11 - Toolbar Video browser
7-56 - Button -> Refresh files

Refresh files.
This button is present on:
6-11 - Toolbar Video browser
7-57 - Button -> Open folder

Open folder.
This button is present on:
6-11 - Toolbar Video browser
7-58 - Button -> Change the location of the video folder

Change the location of the video folder.
This button is present on:
6-11 - Toolbar Video browser
7-59 - Button -> View Image File
View the selected image file.
This button is present on:
6-9 - Toolbar Image Browser
7-60 - Button -> Send image file to recycle bin
Send the selected image file to the system recycle bin.
This button is present on:
6-9 - Toolbar Image Browser
7-61 - Button -> Small thumbnails

Small thumbnails.
This button is present on:
6-9 - Toolbar Image Browser
7-62 - Button -> Medium thumbnails

Medium thumbnails.
This button is present on:
6-9 - Toolbar Image Browser
7-63 - Button -> Big thumbnails

Large thumbnails.
This button is present on:
6-9 - Toolbar Image Browser
7-64 - Button -> Refresh files
Refresh files.
This button is present on:
6-9 - Toolbar Image Browser
7-65 - Button -> Open folder
Open folder.
This button is present on:
6-9 - Toolbar Image Browser
7-66 - Button -> Change the location of the image folder
Change the location of the image folder.
This button is present on:
6-9 - Toolbar Image Browser
7-67 - Button -> Play

Play the video file.
This button is present on:
6-12 - Toolbar Video Player
7-68 - Button -> Pause

Pause the video file.
This button is present on:
6-12 - Toolbar Video Player
7-69 - Button -> Stop

Stop the video file.
This button is present on:
6-12 - Toolbar Video Player
7-70 - Button -> Take Picture ( Capture image )
Take picture.
This button is present on:
6-12 - Toolbar Video Player
7-71 - Button -> Save
Save to disk.
This button is present on:
6-12 - Toolbar Video Player
7-72 - Button -> Full Screen

Play video in full-screen.
This button is present on:
6-12 - Toolbar Video Player
7-74 - Button -> Zoom +

Zoom +.
This button is present on:
6-10 - Toolbar Image Viewer
7-75 - Button -> Minus -

Zoom -.
This button is present on:
6-10 - Toolbar Image Viewer
7-76 - Button -> Save
Save to disk.
This button is present on:
6-10 - Toolbar Image Viewer
7-77 - Button -> Copy to Clipboard
Copy image to clipboard.
This button is present on:
7-78 - Button -> Information about image
View information about image.
This button is present on:
6-10 - Toolbar Image Viewer
7-79 - Button -> Take picture from Monitor
Take picture from the display device the toolbar is serving. No other FXS or images
are added to the picture taken, only the display device.
This button is present on:
6-16 - Monitor Capture Toolbar
7-80 - Button -> Capture full area of display device.

Capture full area of display device.
This button is present on:
6-16 - Monitor Capture Toolbar
7-81 - Button -> Capture rectangle area around mouse cursor pointer.

Capture rectangle area around mouse cursor pointer.
This button is present on:
6-16 - Monitor Capture Toolbar
7-82 - Button -> Change size of area to capture around mouse cursor pointer.

Change size of area to capture around mouse cursor pointer.
This button is present on:
6-16 - Monitor Capture Toolbar
7-83 - Button -> Select region of the display device for capture.

Select region of the display device for capture.
This button is present on:
6-16 - Monitor Capture Toolbar
7-84 - Button -> Change size of area to select display device region.

Select region of the display device for capture.
This button is present on:
6-16 - Monitor Capture Toolbar
7-85 - Button -> Find Window.

Find window by means of drag & drop: Drag the icon from the toolbar and drop over the window
you want to capture.
This button is present on:
6-16 - Monitor Capture Toolbar
7-86 - Button -> Find Window in Exclusive Mode.

Find window by means of drag & drop: Drag the icon from the toolbar and drop over the window
you want to capture.
On exclusive mode the window selected is the only source of capture and will be captured
regardless if there are other windows on top of it.
This button is present on:
6-16 - Monitor Capture Toolbar
7-87 - Button -> Change video capture frame-rate.

Change video capture frame-rate.
Values allowed are 1 to 60. The higher the frame-rate the higher the CPU usage.
This button is present on:
6-16 - Monitor Capture Toolbar
7-88 - Button -> Edit settings.
Open FXS of family 'Monitor' represented by the toolbar for edition.
This button is present on:
6-16 - Monitor Capture Toolbar